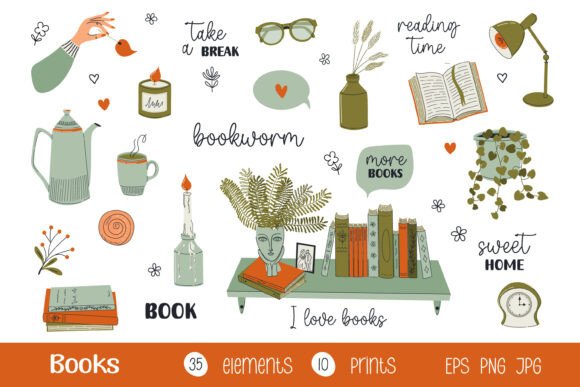
Books Set of Elements and Prints: A Practical Guide to High-Quality Digital Assets
Creating a visually appealing design often hinges on the quality and versatility of the assets you choose. Whether you are designing a cozy reading nook illustration, crafting social media graphics for a bookstore, or developing educational materials, the right digital elements can elevate your work from amateur to professional. The Books Set of Elements and Prints offers a curated collection designed specifically for these purposes. However, simply downloading a bundle is not enough. Many creators overlook critical technical details that can hinder their workflow or degrade the final output. Understanding how to properly evaluate and utilize these resources is essential for achieving consistent, high-quality results.
Understanding the Value of Versatile File Formats
One of the most common misconceptions among beginners is that all image files are created equal. When evaluating a Books Set of Elements and Prints, the variety of file formats included is a primary indicator of its utility. This specific collection provides assets in PNG, JPG, and EPS formats. Each serves a distinct purpose, and ignoring these differences can lead to significant editing challenges.
PNG files with transparent backgrounds are indispensable for layering. If you are composing a scene with overlapping books, plants, and candles, transparency allows you to place elements seamlessly without manual background removal. Conversely, JPGs with white backgrounds are ideal for quick mockups or print-ready documents where transparency is not required. The inclusion of vector EPS10 files is perhaps the most valuable aspect for professionals. Vectors allow for infinite scalability without pixelation, ensuring that your designs remain crisp whether they are printed on a business card or a large poster. Failing to utilize the vector files when scaling up is a frequent error that results in blurry, unprofessional imagery.
The Pitfall of Ignoring Resolution and DPI
Resolution is another area where creators often cut corners, either due to ignorance or haste. This collection boasts a resolution of 300 DPI (dots per inch). For digital-only use, such as web banners or social media posts, 72 DPI is often sufficient. However, for any physical product—such as prints, stickers, or packaging—300 DPI is the industry standard. Using lower-resolution images for print results in jagged edges and pixelated details, which can damage brand credibility.
A practical mistake many make is assuming they can upscale a low-resolution JPG to meet print standards. This is technically impossible without significant quality loss. By choosing a set that explicitly provides 300 DPI assets, you future-proof your designs. Always check the DPI before starting your project. If you are working on a digital-only campaign, you can downscale for faster loading times, but you cannot effectively upscale. Starting with high-quality source files gives you the flexibility to adapt to various mediums without compromising integrity.
Overlooking Composition vs. Individual Elements
This bundle includes both individual elements and pre-made compositions. A frequent oversight is treating these two categories identically. Individual elements, such as single books, potted plants, or lit candles, offer maximum flexibility. They allow you to build custom scenes tailored to specific narrative needs. Pre-made compositions, on the other hand, provide instant visual balance and aesthetic cohesion. They are time-savers for projects with tight deadlines.
The mistake lies in trying to deconstruct a composition to extract individual elements. While possible, this often leads to messy edges and inconsistent lighting. Instead, use compositions as foundational layers or inspiration for layout, and use individual elements to add unique touches. For instance, if you are designing a quote graphic, use a pre-made composition as the background texture and overlay your text. Then, add individual decorative elements around the text to frame it. This hybrid approach maximizes efficiency while maintaining creative control.
Vector Editing: A Skill Worth Developing
Many users download vector EPS files but never open them, sticking instead to raster images like PNGs. This is a missed opportunity. Vector files allow you to change colors, adjust shapes, and modify details without losing quality. For example, if your brand palette requires a specific shade of green for the plant leaves, you can easily recolor the vector element. With a PNG, you would need complex masking and color adjustment tools that rarely yield perfect results.
You do not need to be an expert illustrator to benefit from vectors. Basic familiarity with software like Adobe Illustrator or free alternatives like Inkscape can unlock significant value. Before dismissing the EPS files as too complex, consider spending thirty minutes learning how to ungroup and recolor simple shapes. This small investment in skill development can drastically improve the customization potential of your Books Set of Elements and Prints.
Ensuring Commercial Viability and Licensing Clarity
Before integrating any asset into a client project or commercial product, verifying licensing terms is non-negotiable. While this article focuses on technical usage, legal clarity is part of the evaluation process. Ensure that the license covers your intended use case, whether it is digital advertising, physical merchandise, or editorial content. Misunderstanding licensing can lead to costly legal issues later. Always keep a record of your purchase and license agreement. This due diligence protects your business and ensures peace of mind as you scale your creative output.
Practical Steps for Effective Integration
To get the most out of this collection, adopt a structured workflow. Start by organizing your files into folders based on format and type. Keep your PNGs, JPGs, and EPS files separate to avoid confusion during the design process. When starting a new project, assess the final output medium. If it is for print, prioritize EPS and high-resolution PNGs. If it is for web, optimize your PNGs for file size without sacrificing visual quality.
- Audit your needs: Determine if you need flexible individual elements or quick compositions.
- Test scalability: Open an EPS file and scale it up to ensure it meets your largest format requirements.
- Check color consistency: Ensure the colors in the digital assets align with your brand guidelines or project theme.
- Layer strategically: Use transparent PNGs for layering and JPGs for static backgrounds to manage file sizes efficiently.
By approaching the Books Set of Elements and Prints with a clear understanding of file formats, resolution requirements, and strategic usage, you avoid common pitfalls that plague many designers. This thoughtful application ensures that your final designs are not only aesthetically pleasing but also technically robust and professionally executed. Whether you are a seasoned entrepreneur or a hobbyist blogger, mastering these fundamentals will enhance your creative efficiency and the overall quality of your visual communication.